|
2.3 Managing Your SSL Certificate
In the left frame of the System Management page, under Configuration click the
SSL Certificate link. Step 1 of setting up an SSL certificate is displayed as in Figure 2.5.
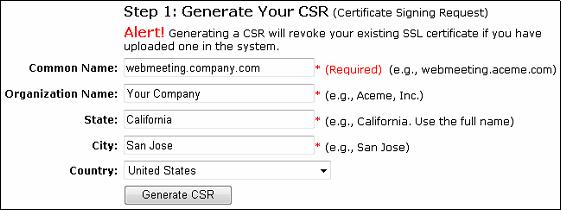
Figure 2.5 Setting up an SSL Certificate, step 1
The following describes the fields in Figure 2.5.
- Common Name
This is the domain name for your RHUB appliance. This must match the domain name you specify in your SSL certificate.
- Organization Name
This is the Organization Name you specify in your SSL certificate.
- State, City and Country
This is the State, City, and Country that you specify in your SSL certificate.
Next, obtain an SSL certificate as shown in Step 2 (Figure 2.6). For the SSL certificate, specify the same Common Name, Organization, State, City and Country that you specified in Step 1.
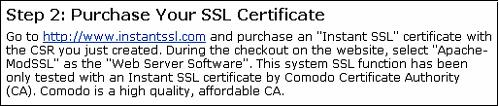
Figure 2.6 Setting up an SSL Certificate, step 2
Locate your SSL Certificate file and your CA Root Certificate file. Using Microsoft WordPad, copy and paste the contents of these files into the files shown in step 3 (Figure 2.7).

Figure 2.7 Setting up an SSL Certificate, step 3
Test your SSL Certificate as described in step 4 (Figure 2.8).

Figure 2.8 Setting up an SSL Certificate, step 4
|